My Drywall Ceiling Repair
A leaky roof led to my drywall ceiling repair project.
After all my bragging on my transite roof tiles you would think I wouldn't have a problem, but I did.
In this article you article you will get a look at my drywall ceiling installation. In the course of showing you my how I installed the drywall I will cover:
- drywall mudding
- drywall sanding
- drywall finishing
- drywall painting and
- how I applied a drywall texture with a texture paint.
My Roof Leak
When my daughter reported that the clothes in her closet were wet I knew I was in trouble. Sure enough I could see the plaster ceiling bowing where the water was dripping.
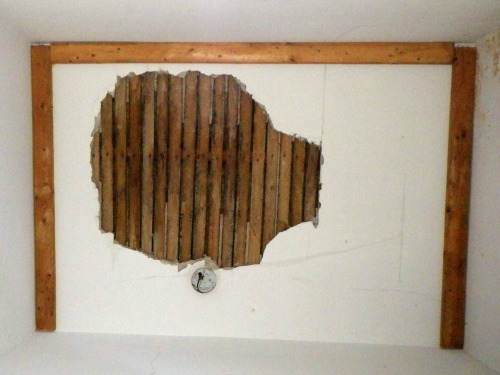 Ceiling with damaged plaster removed. Here I have already started adding the framing for the drywall.
A trip to the attic is never easy in my house. It involves bringing a ladder inside and up the stairs, and then my squeezing through a small access panel while pushing myself up with my arms. One of these days I am going to install a better system.
I discovered a crack in one of my roof tiles. My first order of business was to protect the ceiling below and for that a bucket came in handy.
I couldn't repair the roof while it was raining, so I had to wait a few days. With my roof's tiles replacing the damaged tiles would involve removing most of the tiles on that face of the roof. I had done this on my porch before and I wasn't going to try it again unless I had to.
Instead I chose the expedient used by several of my predecessors in this home, I caulked the broken tile.
Now I could focus on repairing the closet ceiling.
Drywall Ceiling Repair - Replacement Decision
A close examination of my daughter's ceiling revealed an area about a foot square that was bowing down. The water had saturated the plaster. This does two things.
It weakens the plaster. Wet plaster has no strength, so it won't support weight.
It makes the plaster heavy. Since it is also weak the plaster can't support its own weight. Had the leak continued it would have fallen on its own.
I basically had two options:
- Repair the plaster
- Replace the plaster
Removing the sagging plaster would create such a large hole in the ceiling that it would essentially require replastering. A little crack I can handle. Putting in a new plaster ceiling, even for one square foot is beyond me. The old plaster is over an inch thick and was put on in several layers.
I opted to replace the plaster with drywall. An old house purist might scoff at this, but it was in a closet, hidden from view and I am not a purist.
Drywall Ceiling Repair Tactics
The next question I had to face was one of tactics. Do I remove all the old plaster and apply the drywall to the old lathe or do I install the drywall as an additional layer below the existing ceiling?
If I removed all the old plaster I would have a problem at the joint between the wall and the ceiling. I would need to create a clean break line between the wall and the ceiling. This would be difficult and I would likely end up pulling down some of the closet wall along with the ceiling.
I did not want to pull down the plaster walls just to install a ceiling. It made more sense to apply the drywall to the existing plaster.
Drywall Ceiling Installation Prep
Preparation for this drywall ceiling repair project involved clearing out the closet and then covering everything in my daughter's room with drop cloths.
Anytime you do a drywall ceiling repair drywall dust will get everywhere. You sand it off at the ceiling and it travels a long way as it floats to the ground. My experience with prior projects is that it travels a long way, and is difficult to remove. Cleanup on a surface is easy, but it penetrates into cracks.
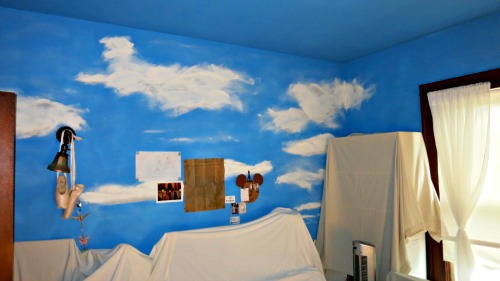
I did find a new product that helped with this problem. The drywall mud I used was listed as a low-dust product. Evidently it sands off in larger particles which are heavier and less likely to remain airborne. I think it lived up to its billing, but it was still a mess to clean up. Drywall ceiling repairs are just plain messy. Cover everything you can, especially electronics.
The other part of the prep involved removing the loose plaster. This was accomplished with a dust mask, a hammer, and a broom and dust pan. My goal was to remove anything that would keep the drywall from fitting flat against the existing ceiling.
The dust mask was essential. Plaster dust is a little caustic and you will feel it later if you don't protect yourself now.
Framing and Shimming for My Drywall Ceiling Repair
Having removed the loose plaster I ended up with a large hole in my ceiling, probably about three foot square. The lathe was still in place, so I did not have insulation raining down on me. However I could not leave that large an area without a support for the drywall. I would need to add shims between the lathe and the drywall.
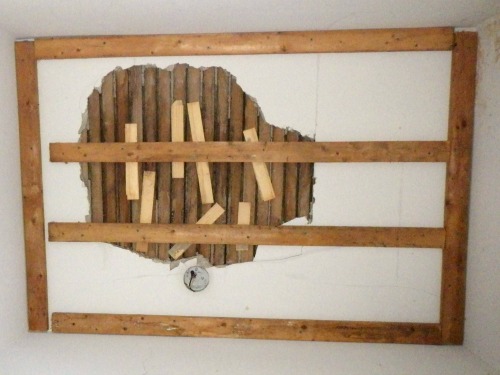
While I could apply the drywall directly to the plaster I elected to add wood framing between the plaster and the drywall. This was going to make the shimming easier and provide a wider target for my drywall screws.
Screws hitting only the lathe might hold, but it provides a much surer hold if you can screw into the joists. Hitting the joists while shooting a furring strip would be easier and If I missed and had to reshoot it would not be a big problem.
If I missed when I was shooting through the drywall I would end up with extra holes to fill. It is also harder to hit because you are shooting blind. The drywall covers up all your visual references so it is hard to know where to shoot. With the 3 inch boards I ended up having I had a much broader target.
The framing also made shimming easy. I simply screwed down a furring strip where it was supported by the plaster. Then I added to shims underneath. The shims are angled, so having two shims ride on top of each other while facing opposite directions gives you a flat surface that can be varied in thickness.
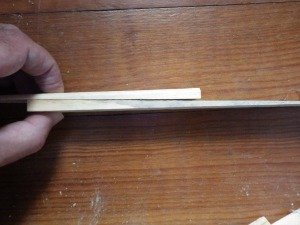
In this case I simply installed one shim from either side and moved them together until they pushed up against the strip. Then I shot a screw on either side.
For screwing the frame in place I used deck screws. Since I needed to drill through over an inch of plaster, plus a half-inch of furring strip before I ever reached wood I needed long screws. Deck screws are essentially long drywall screws that have been galvanized or coated to prevent rust.
Cutting the Drywall
Next I cut the drywall to size. This is easy with a box knife. You don't actually cut all the way through. All you need to do is penetrate the paper on one side of the drywall, and score the drywall with a couple of swipes of the blade. Then you can bend the drywall and it will break where it was scored. At the break cut the paper on the opposite side. Two such cuts and I had a rectangle of drywall that matched my ceiling.
The other complication was to drill a hole in drywall for the ceiling lamp wires. This was easy enough to do, but be careful that you drill it in the right spot. I do recall a project where I cut the hole, but discovered I had cut wrong. How embarrassing.
When you have an extra hole in your drywall you end up with a drywall ceiling repair project within a drywall ceiling repair. It is better to just cut it right the first time.
Lifting the Drywall
Professional drywall installers have jacks that lift the drywall into position. DIYers have their sons help them. In this case the drywall was fairly small so it didn't take a lot of strength. The difficult part was lifting the drywall while threading the electrical wires through the small hole.
I had to tie some string to the wires so I could thread the string through the hole before lifting it over the level of the door transom. Above that level I had no access for my hands to get behind the drywall.
Once we had the drywall in place I drilled about six drywall screws before allowing my son to release the drywall. In total I drove about 20 screws.
Greenboard Drywall and Your Drywall Ceiling Repair
You will notice in my pictures that I used greenboard. Greenboard is a type of drywall that has a waxy coating that helps prevent water from penetrating.
It was really a spur-of-the-moment decision to use this product. I had used it in my bathroom for the walls that were not directly in the shower area. I had used cement board for the shower area.
My reasoning for using this type of drywall is that I feared an eventual return of the leak. However, to gain any benefit from the greenboard I should have turned the green side up, towards the potential future leak.
For this project my extra cost was minimal. I only used one board. When you are doing all the walls and ceiling for a large room that cost adds up.
I could have used cement board for the ceiling, but it is more difficult to work with and heavier. Since I had to hoist it over my head I decided against this.
Anyway, the correct answer is to avoid roof leaks. No ceiling is designed to accept water damage. That isn't its purpose.
Its a fairly simple equation. Roof leaks = drywall ceiling repair project.
Drywall Ceiling Repair - Drywall Mudding
With the drywall in place the next step in any drywall ceiling repair is to seal up the joints and the screw holes.
The screw holes are easy. You apply the drywall mud or joint compound with a putty knife.
The joints between drywall sheets or between walls and ceilings are more difficult. If all you use is mud a crack will eventually form as the mud shrinks.
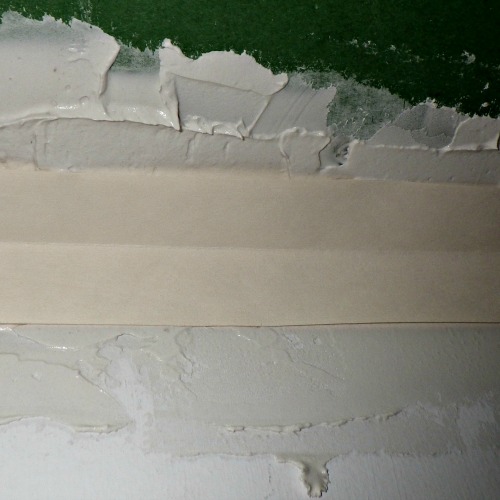
To prevent this joint tape is used. Sometimes you will hear this referred to as drywall tape. Mud is applied over and under this tape and, after it is dried, the excess is sanded away.
There are two options with the tape. Either you use the old paper tape or you use a mesh synthetic tape. I have used both in the past.
Unfortunately it has been so long that I forgot how much nicer the synthetic tape is and I used the paper tape. In the words of Forrest Gumps mama "Stupid is as stupid does".
The synthetic tape has a sticky backing and you apply it dry. It has lots of pores for the joint compound to flow through so you apply the mud on top and the process of smoothing out the mud with a putty knife or a taping knife pushes the mud through the tape so that the joint is thoroughly saturated with mud.
With the paper tape drywall mudding is a little more complicated. You apply mud first, so that there will be mud behind the tape when you do the drywall taping. Then you apply another layer of mud on top of it.
When I mud I spray or wipe water onto the drywall first. The drywall paper is dry and thirsty and I don't want the mud I apply to start drying before I am finished working it. However, with the green boards water repellent surface I did not need to do this.
You should also wet down the paper tape prior to applying it, for the same reason.
One reason why the paper isn't as easy to use is that you might have to push it down to keep it from riding up to high on that first layer of mud you put down. This isn't easy to do as it tends to float on the mud underneath it and it isn't porous.
 |
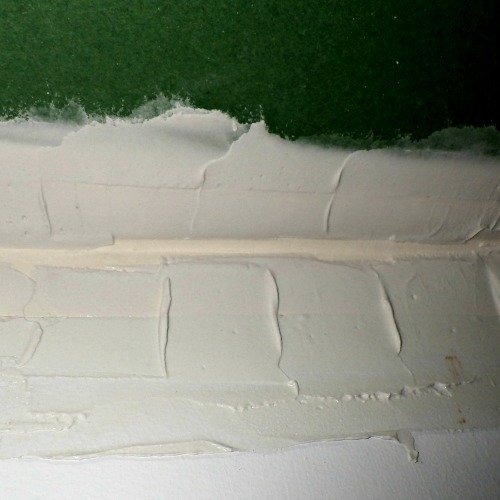 |
Each drywall board has a little depression on the sides. If you can keep the tape in the depression below the top surface of the drywall you can sand the joint flat. It doesn't work out that way on the ends, since they aren't depressed, or where you are joining up with an existing wall, as I was installing this ceiling. You usually end up with the joint having a slight rise which you disguise as best you can with smooth sanding.
With a corner joint you have to fold the paper in half to give it a 90 degree bend. The paper comes seamed so it is easy to bend, which is an advantage over some of the synthetic tapes.
One trick to drywall mudding and drywall taping is to use as little mud as possible. If you have a lot of mud in place you will end up with a wide joint. That just give you more to sand later. Use just what you need to fill the depression. Where there isn't a depression use just what you need to cover the tape.
I remembered this rule after I had started on one of the joints. That joint required more rework and more sanding than the other seams.
I could have used a corner trowel. It would have made sense. I don't have one, but if my drywall ceiling repair project had been larger it could have saved me several hours and resulted in a sharper seam.
Drywall Ceiling Repair - Mud, Sand, Repeat
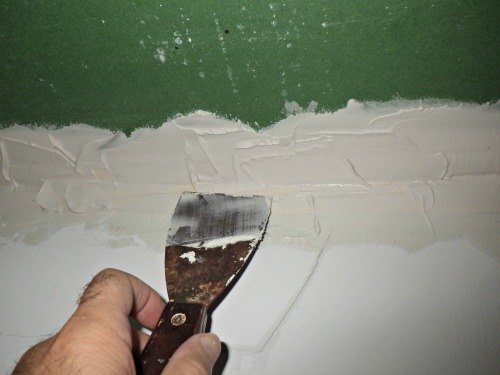
Putting mud into the corner between the ceiling and the wall is tricky. When you smooth out the ceiling you end up messing up the wall. Go back over the wall and your knife scrapes the ceiling.
In the end your drywall mudding will not be perfect the first round. After it dries you will need to sand it down and apply a thin layer to fill in the low spots.
If your drywall ceiling repair only required filling in the small depressions over the screws you could probably sand the mud down after only a couple of hours.
At seams the mud will be a lot thicker and may take a couple of days to dry.
You can use regular sand paper on your drywall ceiling repair but for large project you are probably best off using sand paper designed for drywall. It is an abrasive applied to a mesh so that there are holes for the dust to pass through. It takes longer to clog and it is easier to shake out the excess dust.
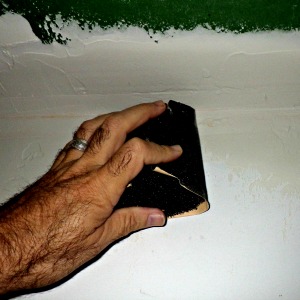
For my small drywall ceiling repair project I just used what I had, which was regular sandpaper. I wrapped it around a foam block. This flexes a little, which helped when I was sanding in the corner seam.
For larger drywall ceiling repair projects you might want to invest in a pole sander. I have one of these. Sanding up high seems easy enough when you start, but after a while your arms get really sore. Worse, the next day you might not even be able to lift them over your head. It is just an unnatural movement and your body will make you pay later.
I did not use it for this project. The confines of the closet were so narrow that it would have been difficult to manipulate the pole sander. Also, I haven't seen that thing in several years. I think it has gone to the land of lost tools.
However, had I been doing a larger project I would have forked over the money for a new one. Good tools are cheaper than doctor visits and a better choice than pain killers.
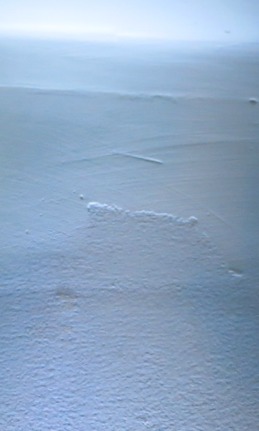
Sand the mud smooth. Then take a flashlight and shine it where it is almost flat to the wall. You will see all the places that need more sanding.
After sanding wipe off the excess dust and apply more mud to the low spots. Drywall mudding is rarely done in one pass. It might take three passes or even four. In the end you can make it as smooth as what a professional would have done. It will take you five times longer, but it will look just as good.
The flashlight trick should be used with each layer of mud. It is almost impossible to see the low spots unless you can create shadows, but these same impossible to see low spots will stand out like a beacon if you apply any kind of glossy paint. Even an eggshell paint will show up more defects than were visible when the drywall was uncoated.
Drywall Ceiling Repair - Prime
I have yet to see a house where the homeowner decided to leave the drywall in its natural state. Usually this means it gets painted. However the dried drywall joint compound and the drywall paper will absorb paint differently. Both need to be sealed with a good primer that is designed for drywall.
Some primers can be used for drywall and many other surfaces. This will probably work. Primer made exclusively for drywall is best, but the critical thing is to not use a primer that doesn't specify that it can be used on drywall.
I have made this mistake before. Not pretty.
In my case I used a Kilz primer. The one I chose was their latex primer. It is easier to clean up, but it doesn't seal the nasty stuff quite as well as their oil-based primers.
Kilz is used when you have a problem with chemicals or mold bleeding through your paint. In my case I had some water damage from years prior and I was afraid it would show through the paint. I have used the same primer on wood where pine sap was bleeding through and it had not worked out. However, in this case I chose well.
I applied the Kilz over the new drywall and over some repairs I made to the walls, and over the old water damage.
Drywall Ceiling Repair - Drywall Texture
Drywall can be painted without applying any texture.
In my case I was joining drywall to plaster. The plaster was going to bear a slightly different surface texture than the drywall. Since this was a closet I could have gotten by without applying a texture, but I also had some old wall cracks to hide.
You can apply texture and then paint. Essentially you mud up the entire wall and create a pattern with a brush or a roller. For deep textures this works well.
I only wanted to apply a light sand texture and I wanted to keep the work to a minimum. For this situation there is a texture additive you apply to the paint.
While the additive is called sand it is either something like a very light coral sand or it is perlite. Whatever it is it is extremely light, so it doesn't sink to the bottom of the paint can.
I added it to my paint and the paint became almost as thick as the joint compound. You lose about half your coverage when you do this, but in my case I still ended up with about 1/3 of a can of paint left over.
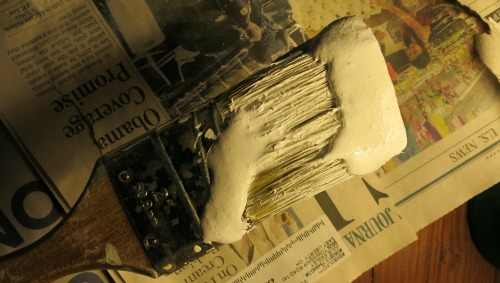
I was impressed with how well it hid my defects. I know there were problem spots. I was on a tight time schedule as I had to finish my project before my daughter returned from camp, so I had not done a stellar job.
With the texture applied all of that was forgotten.
Drywall Ceiling Repair - Memoriam
I really hate drywall ceiling repairs. They are messy. Cleanup takes a long time. I have to wear a dust mask. I have to mud and sand several times, which means each time I come away looking like the Pillsbury Doughboy and need a shower.
Nonetheless, it can be a very satisfying project, if you do it well. When you look at your work and you can't tell it is your work because it looks like it was done by a pro, that creates a warm feeling.
I had that feeling when this project was completed.
To Top of Page - Drywall Ceiling Repair
Home - House Design
Please!


New! Comments
Have your say about what you just read! Leave me a comment in the box below.