Lightning Rods and Roof Repair
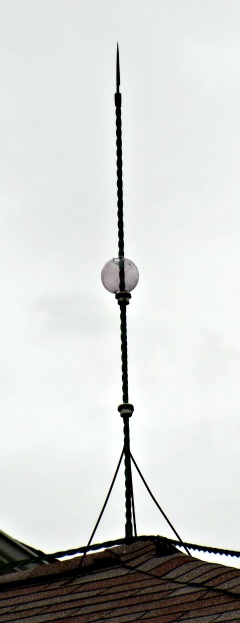
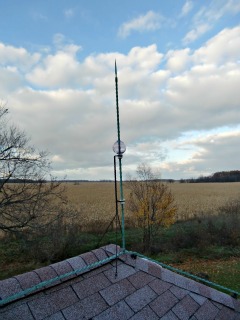
I have antique lightning rods on my roof. When it came time to replace the shingles I had to work around the rods and the grounding strap. These were connected to the roof via insulators held in place with special stamped metal anchors. Actually, though my house has three lightning rods, only one was positioned on the kitchen roof, so the other two I never had to touch.
The problem was two-fold. I had to disconnect the strap from the roof, and I had to replace some of the tie downs.The first part wasn’t too difficult. The metal anchors were nailed to the roof. I could pry up the nails easily.
I was afraid that with the strap disconnected that the rod might get damaged in a wind. It turns out that the lightning rod could be removed from the strap with a pair of pliers and then stored in a safe place.
What I refer to as the strap is actually a very heavy, flat, copper wire that is twisted around in a spiral. It is not easily bent and basically held its position on the roof after I had pulled up the nails. That was in part because it remained connected to the wall below and to the roof of the main part of the house above my kitchen roof. The only real problem was stepping over the strap as I worked on the roof.
The grounding strap and the lightning rod are both copper and are in excellent shape. There are two other rods on the main part of the house, and these are both broken in two, although still functional.
My intact lightning rod has a glass ball about midway down the rod. This is a common design for lightning rods of this era. I am not sure of the purpose. If you look at the old lightning rods probably most have had the glass broken at some point but some still have their glass balls intact.
If lightning strikes the house it will hit the lightning rod and the current will travel down the grounding strap to a grounding rod inserted into the ground. The grounding strap is separated from the house by means of ceramic insulators. This keeps the current from being diverted into the house.
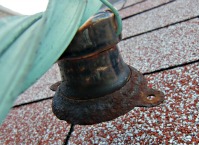
The ceramic is brittle so it makes a poor means of connecting the strap to the roof. To secure the insulator to the roof a stamped metal ring encircles the base of the insulator.
The ring has holes in it and nails are driven into the holes to hold down the insulator. Originally these rings were tin coated, but over time they have rusted. Two of my rings or tie downs had to be replaced.
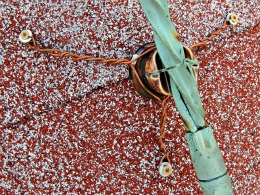
Rather than try to recreate the same type of ring I improvised with some copper wire. As you can see from the photos I simply twisted the wire into a three-way loop. By twisting the wire I was able to tighten it down around the base of the insulator. It was this copper wire that I screwed to the roof.
It is not a perfect system. The copper in the wire and the steel in the deck screws will eventually react and steel screw will corrode away.
The reason for this is the differences in the electrode potential of the differing metals. The electrode potential essentially speaks to the propensity of a metal to give up an electron. Two metals touching will result in a situation where any chemical reactions that occur with the surrounding environment, such as corrosion caused by rain or dew, will draw all the electrons exchanged from the metal with the lower electrode potential, while the other electrode will gain an electron.
In the case of pure iron, its potential is – 0.44 volts. The potential of pure copper is +0.34 volts. This means that iron will act as the anion and copper the cathode and all the corrosion will degrade the iron up until the point that the iron is so corroded that it no longer effectively acts as an electrode. In my case the screw is a grade of steel and both the copper and the steel are alloys with various additives that will effect the electrode potential, so it is difficult to know exactly how serious this problem is unless you know the specific properties of each alloy.
But, there is no need for me to do this for this little project. I just need to either 1) separate the screw from the wire with some nonconductive metal or 2) replace my screws with a copper or brass screw. I did not have the latter when I roofed my house, but can find some at the hardware store. They are a little pricey, but I don’t need that many.
*****
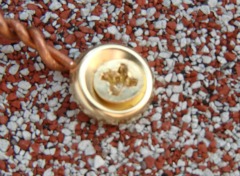
Addendum: I purchased the brass screws and washers to replace my deck screws. The brass screws were very soft and I had difficulty installing them without damaging the heads, but now the tie-downs should last much longer.
To Roof Repair - Main Page in Series
To DIY Roofing - Second Page in Series
Please!


New! Comments
Have your say about what you just read! Leave me a comment in the box below.