Plaster Ceiling Repair
The Cheater's Way
Plaster ceiling repairs are probably a fact of life if you have an older house. Old houses have wonderful plaster ceilings and walls, but foundations shift over time and this leads to large cracks in the plaster. Repairing these cracks can be a problem. The forces that created the crack are still at work, so any repairs made with plaster are likely to crack again, and very quickly.
I recently had to repair a ceiling using a trick I developed a few years back. This trick will keep the crack from reforming while preventing further deterioration from moisture.
The ceiling in my bathroom developed a crack and the paint started pulling away from the crack. The crack is almost directly over my shower, so it receives a lot of moisture, adding to the problem.

My first indication that I had a problem was not the paint peeling. That didn’t become bad until this summer, but last fall I had a man in from our Electrical Coop. He brought along a thermal imaging camera to show me where I was losing heat. I was surprised when he pointed the camera at my bathroom ceiling to discover that I was losing a lot of heat to a hairline crack that I could barely see.
I delayed attending to this problem because it was going to require touching up my paint job, a handyman’s rendition of Van Gogh’s “Starry Night”. That delay cost me as the plaster continued to deteriorate. The paint started to peel away from the crack, but it wasn’t just the paint. The outer layer of plaster was coming with the paint.
When they applied my plaster (back in 1906) they did it in two coats. They laid a thick, heavy layer down directly onto the lathe. This layer had a lot of fiber mixed in with it, to bind the plaster together and give it some strength. The fibers were usually animal hair and they did not allow for a smooth surface, so a second, finish layer was laid down. This layer was thin and fine. It lacked fiber, so it didn’t have much strength, but it could be smoothed out to provide a very flat, even surface. It was this finish layer that was sticking to the paint. The moisture from the shower had penetrated into the plaster enough to weaken the bond between the finish layer and the base plaster.
The traditional plaster ceiling repair method is to mix up some plaster, or drywall compound, or use spackling compound to fill in the crack. Once dried you sand this down and all looks good. The problem is the compound used to repair this is even weaker than the plaster, since it lacks the fibers, and as the house continues to settle the crack will reappear.
I Begin the Plaster Ceiling Repair
For my repair I cut away all the loose surface plaster with a utility knife. Then I caulked the crack with your basic latex caulk. Using a wide putty knife that I wetted down, I spread this caulk to cover the exposed area.
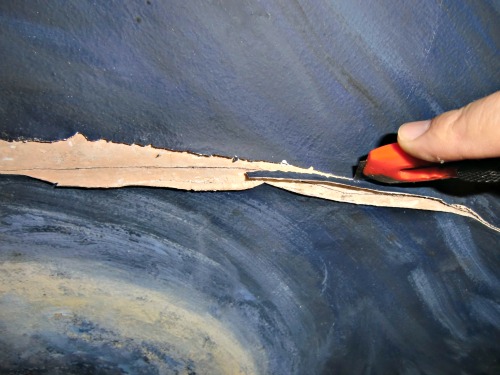
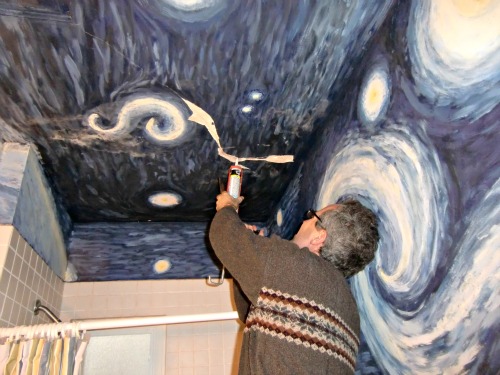
Wetting the putty knife down is critical because you want it to slip right off the metal. You use the putty knife to squeeze the caulk into the crack but also to smooth the surface of the latex. This is not as easy as it sounds. The putty knife will pick up on any surface roughness in the plaster and transfer this to the latex with a wavy pattern. You have to keep the blade wet and hold it almost flat to the surface of the plaster.
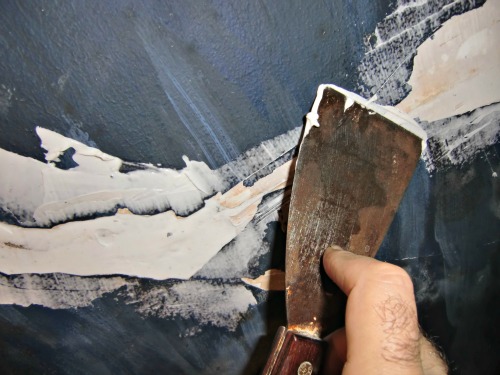
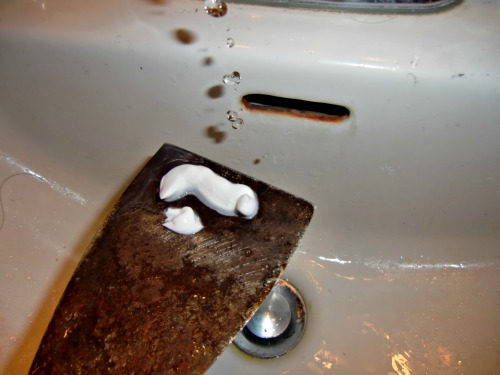
When applying the caulk I used a wet rag to clean up the caulk that strayed beyond the borders of the plaster ceiling repair area. Latex caulk is easy to clean up. I just kept rinsing the rag out in the bathroom sink and going back over the area around the repair until all the excess caulk had been removed.
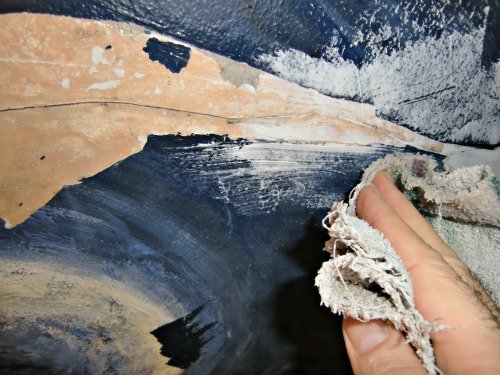
The reason caulk is not usually used in a plaster ceiling repair is that you cannot get the surface of the caulk to be completely smooth. You can sand plaster down, but you can’t sand caulk. The surface will look like it has been repaired. In my case the paint job has a mottled surface that will hide the imperfections in the surface layer, so it should not be noticeable.
The caulk will shrink, which is actually good. This will allow you to apply a layer of drywall mud, or spackling compound, which can be sanded. The benefit of having the caulk under the top layer of spackling is that the caulk will tend to stretch as the crack widens. This spreads the separation over a wider area so that the spackling layer will create a bunch of very small microfractures rather than one big crack. This will delay the day when the crack eventually becomes visible.
However, if you want to try to avoid the reappearance of the crack you can rely on the caulk to form the top surface. This will probably require several layers. The downside is that the top surface won’t be quite as smooth.
In my case, since the mix of colors in my paint job hides surface defects I went ahead and used both techniques, to see which method survives the test of time. Part of my plaster ceiling repair has a top coat of vinyl spackling compound and part has a top layer of latex caulk.
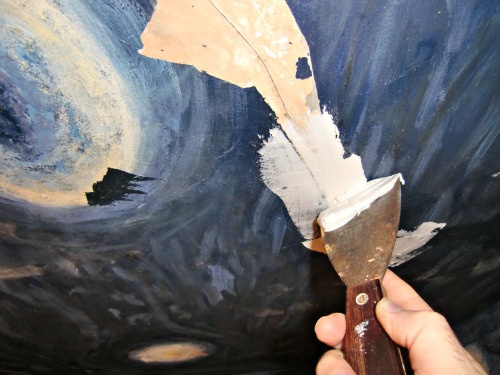
I had originally painted this bathroom 13 years prior. I was dismayed but not surprised to discover that I no longer had a can of the base coat. My paint job was made up of multiple layers of various acrylic paints on top of a latex base coat, so I just pulled out my acrylic craft paints and mixed up a combination of blue and black until I was able to match the base coat.

I applied the paint with a sponge. A brush would have worked, but I want to avoid the bristle lines and create a lightly textured surface that would approximate the texture of the plaster. Several coats of various colors Iater I had a ceiling that looked as good as the original.


Not everybody will have the crazy type of paint pattern that I have. It hides imperfections well. The truth is, when your walls or ceilings start to crack it can be very difficult to get back to a wall that looks as good as the original. Often times not only is the wall cracked, but part of the wall will get pushed in or out, so that the two side of the crack are not even on the same plane anymore. When the cracks get bad enough some kind of sponge or rag treatment of the walls might be your best bet for hiding the repairs.
I don’t recommend the Van Gogh treatment. It is a little overwhelming, especially for a room as small as this bathroom. Still, having some fun with a sponge or a paintbrush is a lot more enjoyable than replacing plaster with drywall.
Here is my ceiling after the repair, and below that you can see a better view of my Starry Night bathroom. I have circled the areas that I repaired in red.

If you get a chance to try my plaster ceiling repair technique, be sure to write back and let me know how it worked out for you. I love to have comments.
To Top of Page - Plaster Ceiling Repair
Please!
Have A Great Story About Your Repair?
Did this repair work for you? Do you have a better idea you would like to share?
What Other Visitors Have Said
Click below to see contributions from other visitors to this page...
Lovely tutorial! 


Finally, a plaster repair technique for someone who does not want to drill anchor after anchor. Looks like it will work well even over time as the joint …
janiepanie56@mail.com 


(My question is refering to your crack repair). Are you talking about the vinyl caulk that is used to patch small nail holes in plaster that hardens and …
Plasterboard Repairs Not rated yet
It is good to know that wetting the putty knife down before use can help it from slipping. A putty knife is a smart way to squeeze caulk into cracks. My …



New! Comments
Have your say about what you just read! Leave me a comment in the box below.